Your first Project
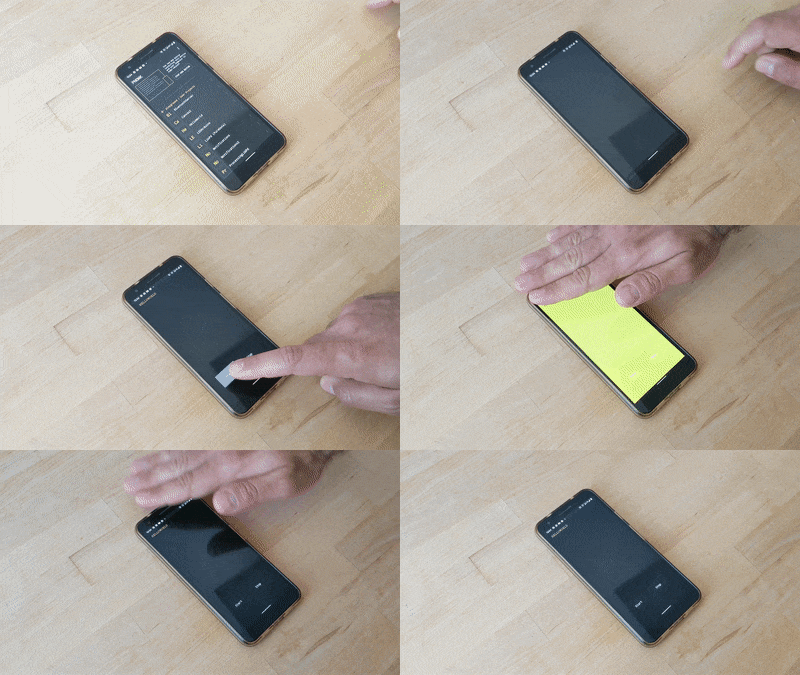
Let's create a basic PHONK's hello world. The project will use the distance sensor of your device to play a sound and change the background color when you hover your hand over it. To start and stop the sensor, we are going to use a couple of buttons.
Open the Web Editor as you did in the previous step. If you had it already opened, click on the top-center area to open the "Projects Area". Write a nice name for your project such as "HelloWorld" and click on Create.
For this example, we need to know 3 things.
- Add some user interface
- Use the proximity sensor of your device
- Play some sounds
You can go to the DOCS, on the top-right area of the Web Editor and do quick browsing on how to use the proximity sensor, add a button and play a sound but being honest, the DOCS are very simple at the moment and is much easier to learn to explore the examples and see how things work.
So I invite you to take some minutes to open the examples to see how things might work (Tip: you can open the examples on different tabs in the web browser)
- Sensors → Proximity
- Graphical User Interface → Basic Views
- Media → Sound Play
So, have a look at them and then continue reading :) ... ... ... ... OK, let's continue!
Step 1 - User Interface
PHONK uses normalized units. Any position and size of a UI element such as a button, text, or image will be in the range of [0.0 - 1.0]. The reason to have them normalized is to be able to quickly create interfaces without using complex layout systems. Of course, it has it's trade-offs but that's for another chapter :)
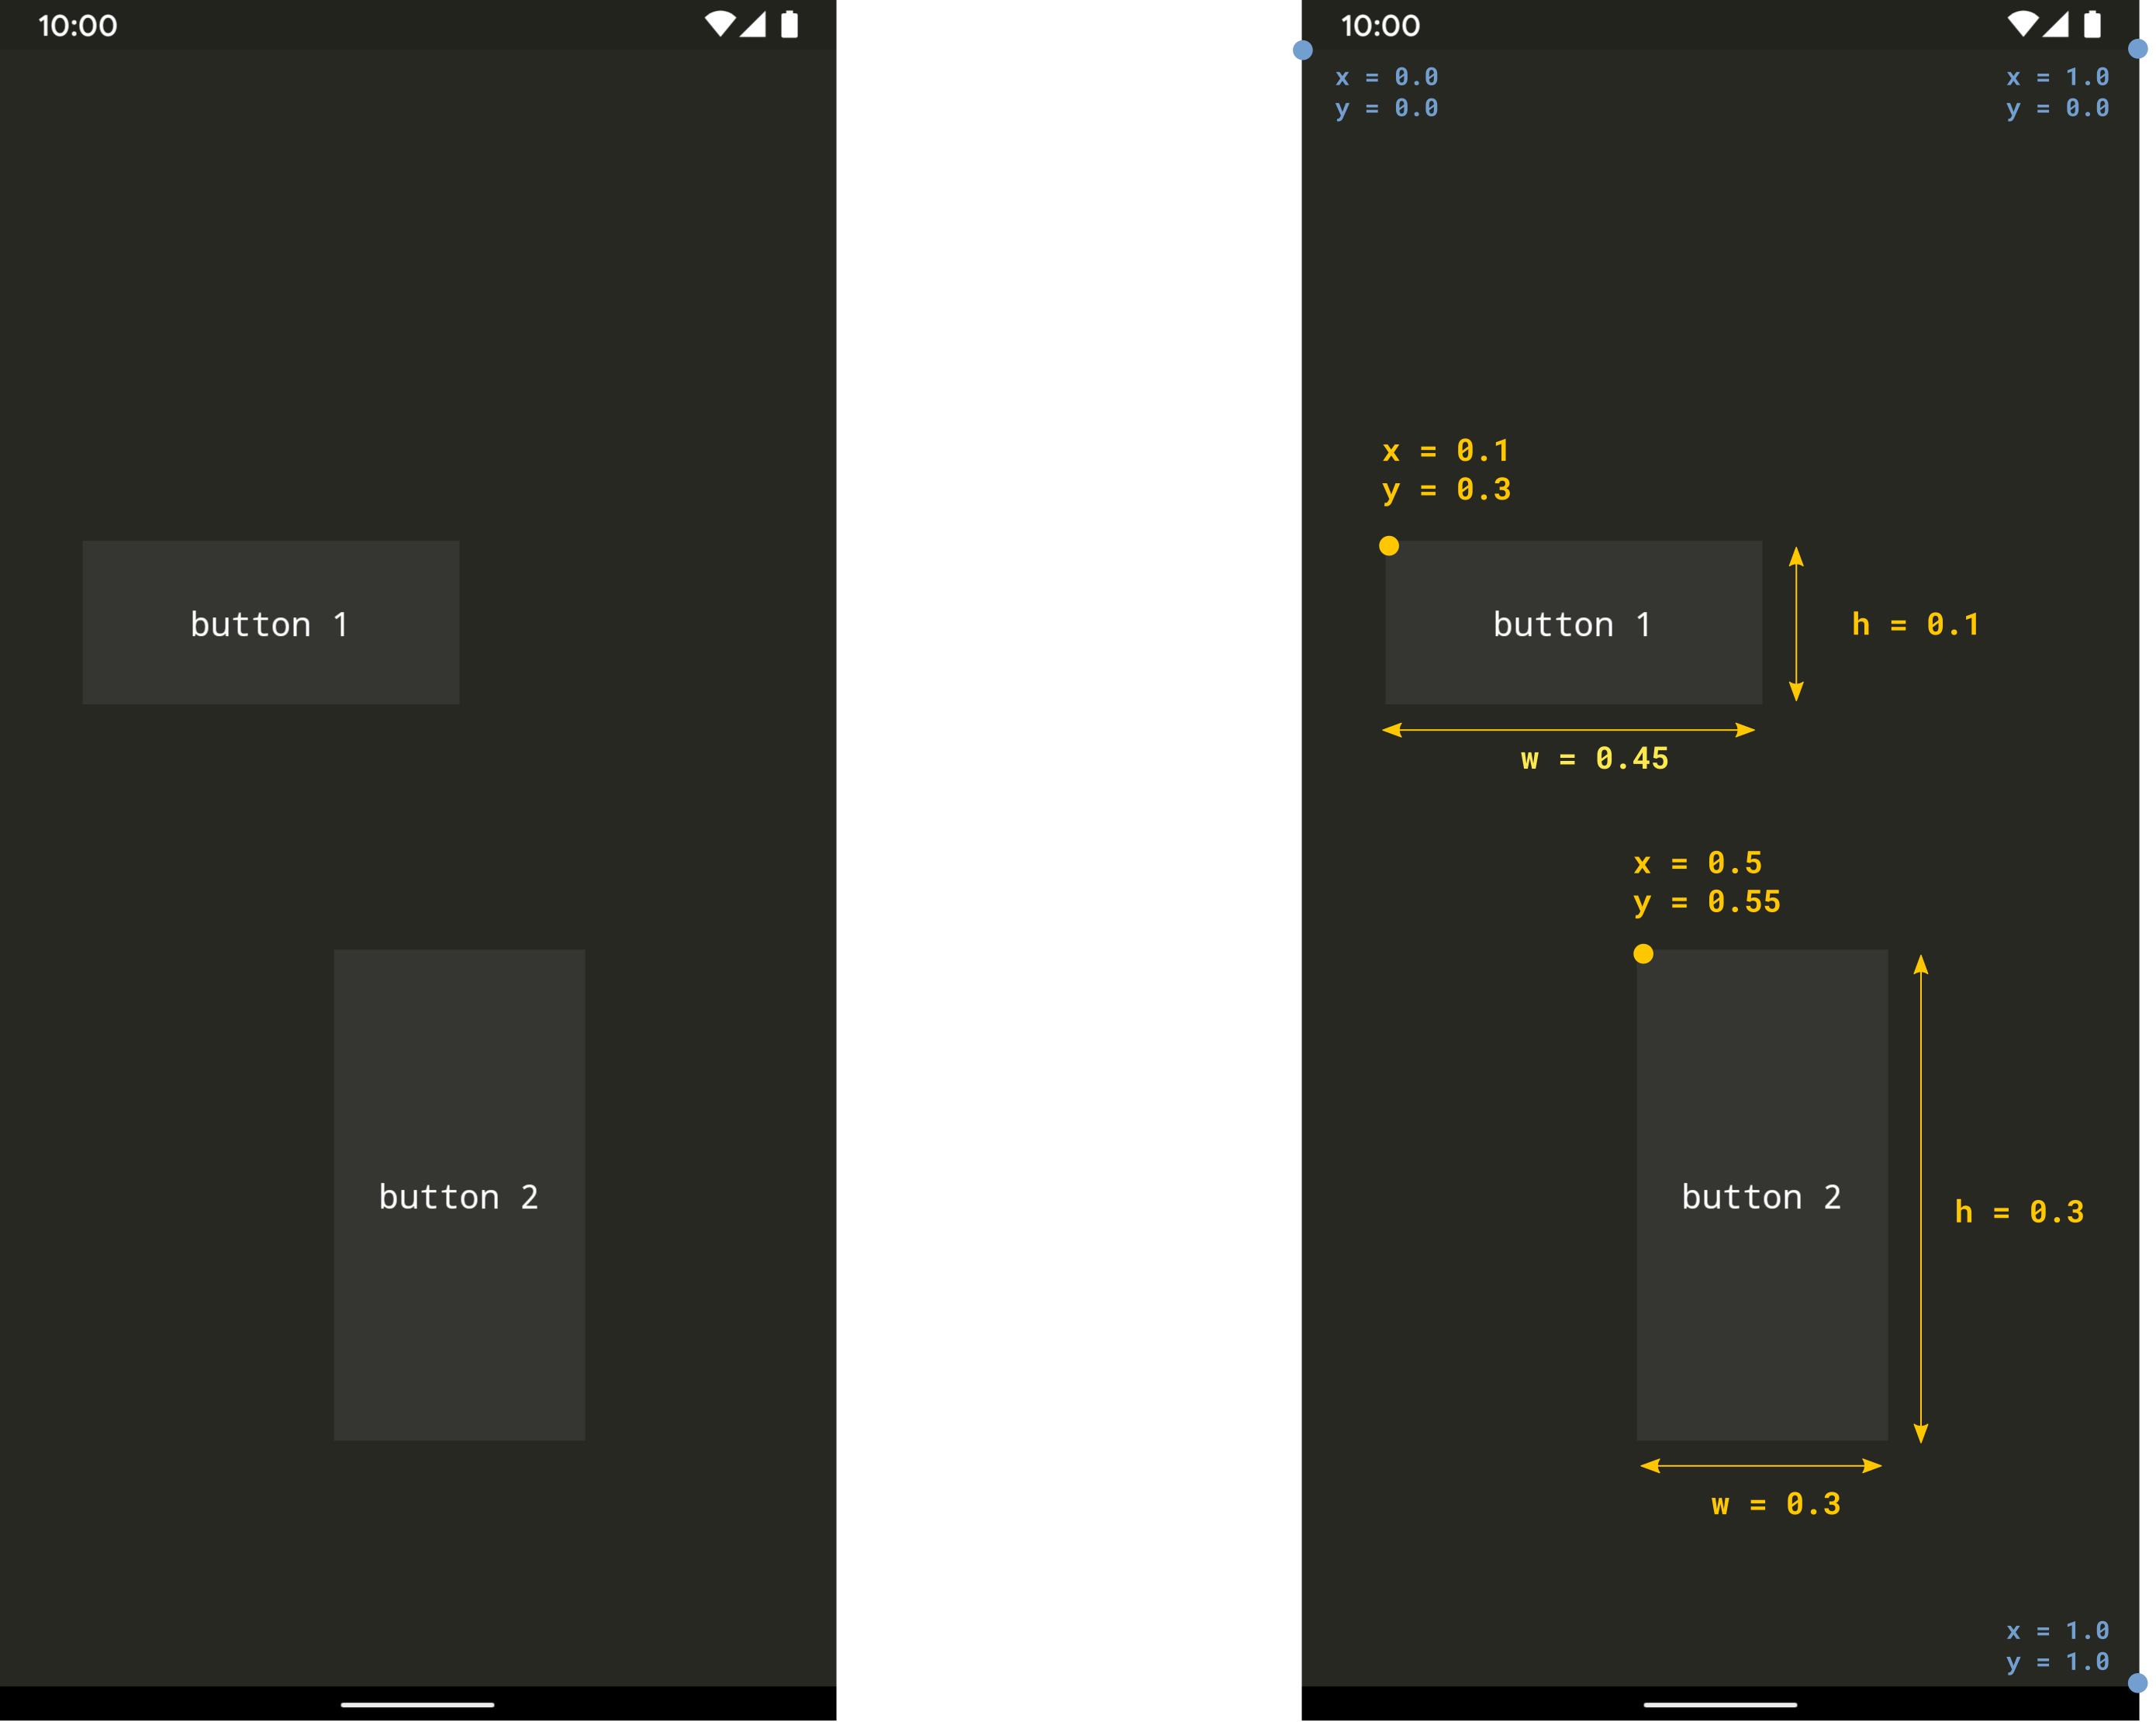
Most of the user interface components need 4 values, the x, y positions, and the width and h height (w, h).
Let's try to add a couple of buttons with different sizes and positions.
ui.addButton('button 1', 0.1, 0.3, 0.45, 0.1)
ui.addButton('button 2', 0.4, 0.55, 0.3, 0.3)
If we run the code we will get the left screen. To make sense of the coordinates on the right you can see in yellow color which value is wich value. Reference positions are added with blue color. It seems confusing, but it is super easy! :)

Note: PHONK can use pixel coordinates as well, check the Graphical User Interface > Advanced positioning example to know more about it.
Then to do something when the button is clicked we use the .onClick callback. Any code we write inside the callback will be executed when the button is clicked. Finally, if we try out the following code we can get a button that changes the background color when clicking on it.
ui.addButton('click me', 0.1, 0.3, 0.8, 0.1).onClick(function () {
  ui.background(255, 255, 0)
})
Step 2 - Proximity Sensor
Using sensors in PHONK is quite simple. As we see below, we have an onChange method that gives us the sensor data as soon as the sensor has a new value. The .start() method tells the sensor to start reading values and as you might expect, you can stop the sensor using .stop()
sensors.proximity.onChange(function (data) {
  console.log(data.distance)
})
sensors.proximity.start()
Run the code and hover your hand over the device, you should be getting some values in the console so we can understand the sensors values.
Note: A good tip to understand sensors is to display the sensor data. The examples plot the data graphically so you can see the values and make sense of how they work rapidly.
Note: PHONK will stop automagically the sensor as soon as you exit the project, so most of the time you don't need to call
.stop()in your script.
Step 3 - Playing a sound
Playing a sound is easy, with the following code we are ready to go.
var player = media.createSoundPlayer()
player.load("sound.wav")
player.play()
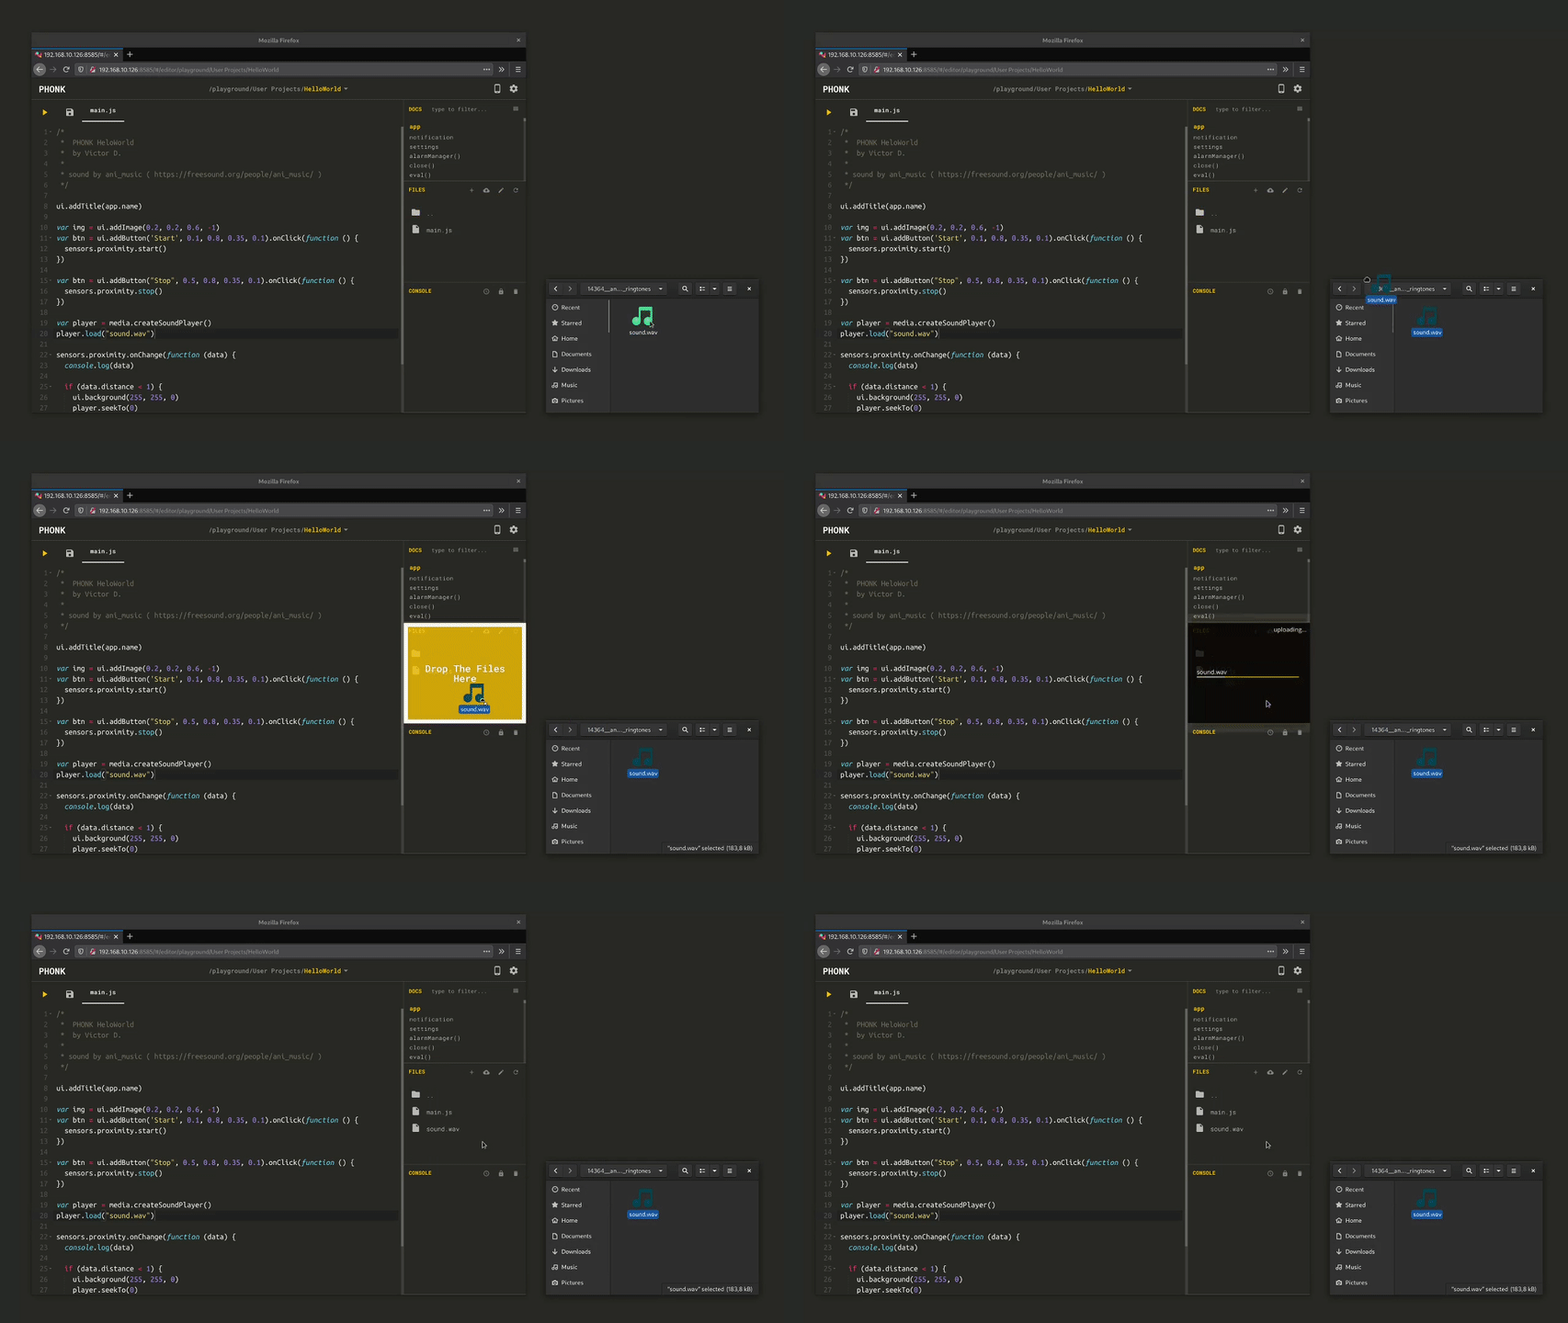
But now you might wonder how to add sounds to the project That's easy! Download this file as an example. Then go to your file explorer and drag and drop the file over the FILES area in the Web Editor. The files will upload quickly.

Note: As today there is some bug I could not hunt yet on the web editor while uploading. If it happens to you, just reload the tab, sorry! :)
Final Step - Putting all together
Now that we know how to do each part let's combine them as the following code:
/*
 *  PHONK HelloWorld
 *  by Víctor D.
 */

ui.addTitle(app.name)

var img = ui.addImage(0.2, 0.2, 0.6, -1)
var btn = ui.addButton('Start', 0.1, 0.8, 0.35, 0.1).onClick(function () {
  sensors.proximity.start()
})

var btn = ui.addButton("Stop", 0.5, 0.8, 0.35, 0.1).onClick(function () {
  sensors.proximity.stop()
})

var player = media.createSoundPlayer()
player.load("sound.wav")

sensors.proximity.onChange(function (data) {
  console.log(data)

  if (data.distance < 1) {
    ui.background(255, 255, 0)
    player.seekTo(0)
    player.play()
  } else {
    ui.background(0, 0, 0)
  }
})
And that's it! We have our quick "Hello PHONK". I hope this is a good first start to play with PHONK.

Exercise: We are using 2 buttons to Start / Stop the sensor. Can you combine it into one? You might check in the examples how to use the Toggle button.
Summary
We learned how to run and modify projects using the PHONK app and the remote Web Editor. We sent data to the console, uploaded files into the project and we presented some hints on how to explore functionality in PHONK using the DOCS and the built-in examples.
If you have any some questions or have a chat, feel free to join the Forums and/or Discord.
Thanks for your time and enjoy it!
Donations
If you find PHONK and this tutorial interesting, feel free to contribute through Patreon. With your help I could spend more time doing open source software and tutorials. I'd love to write the following:
- How to use Bluetooth Low Energy with Arduino compatible boards
- Create music synths with LibPd
- Interactive Graphics with Processing,
- Teaching your phone to recognize images with Tensorflow
- Create a custom OSC controller
- and many more!
